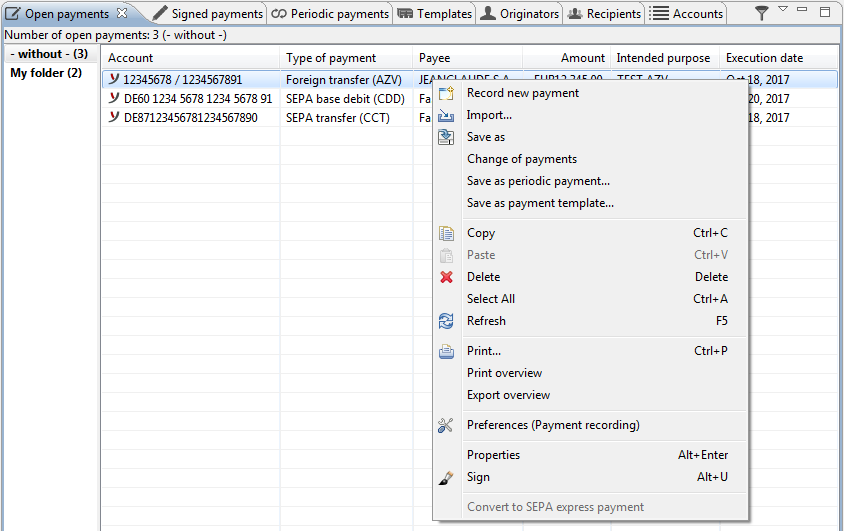
Figure: Overview of open payments with context menu
After you have entered or imported a payment, it is shown in the overview of open payments where it is available for signature. By signing the payment it will be sent to the bank automatically.
By clicking the arrow in the upper right corner of the tab a menu with the item Show folders drops down. With the help of folders you can group payments and thus get a better overview. A payment is moved to a folder simply by dragging and dropping. By right-clicking on a folder, a context menu appears that allows you to create, delete and rename folders.
Furthermore in this menu there is the item Filtering of payments that opens a dialog box, which allows you to enter criteria. Thereby only the payments will be displayed in the overview that meet these criteria. You can also access this function via the icon to the left of the menu. If the filter is activated, the icon is shown as a pressed button. Clicking again removes the filter. Another click calls up the input dialog, which is initialized with the last entered values.

Figure: Overview of open payments with context menu
Signing, importing and converting payments are described in the following sections. With Record new payment a wizard is opened, which allows you to select the type of payment, for which the descriptions can be found below the section Record payment. You can also perform a variety of other functions via the context menu.
You can retroactively edit already entered payments by double-clicking or highlighting the payment and selecting Properties from the context menu. Alternatively, you can also reach this item from the Edit menu or by pressing the Alt+Enter keyboard combination. You are then brought to the same dialog boxes that were used to enter the payment.
This allows you to make changes to several payments that have already been entered at the same time. To do this, select one or more payments and then choose this item from the context menu. Then a dialog box appears which is described in section Change payments. This function is useful, for example, if you have saved signed payments as open payments and then change the execution date and intended purpose for all of them together.
You can save open payments in the original format, e.g. in the format that they are transmitted to your bank. Do so by first highlighting one or several payments, followed by right-click and select Save As from the context menu. After this, the dialog box of your operating system (e.g. Windows) opens in which you can enter the filename and path to a local or network drive.
The selected payment is then saved under a filename that consists of an order number and the order type as an extension. If you have selected several payments for saving, these are saved in one file for the same order type and in several files otherwise.
Likewise, you can save an open payment as a periodic payment or as a template. For this purpose, the respective wizard is called up and the existing payment date are transferred into it. See also the sections New periodic payment and New template.
A SEPA transfer can be converted to an express payment and vice versa.
You can mark one or several entered, open payments, then access the context menu with a right click, followed by the Copy and Paste items. This duplicates the highlighted payments. As is also the case with other applications, you can work with the keyboard combinations Ctrl+C and Ctrl+V. Furthermore, it is possible to drag the marked payments with the mouse outside the program window into a spreadsheet or text editor.
Already entered but not yet signed payments can be deleted. As is the case for many functions in BL Banking, you can accomplish this via the keyboard, the toolbar, the menu, or the context menu. You are prompted to confirm the transaction in an pop-up dialog box to prevent inadvertent deletions.
You can use this menu item to print one or multiple payments. Do so by highlighting one or several lines, then right-click on the selection, followed by selecting the Print item from the context menu. Alternatively, you can also access this function from the File, menu, via the toolbar, or the Ctrl+P keyboard entry. This creates a PDF file, which you can print or forward via e-mail.
This allows you to print single or multiple payments as a tabular overview. There is a setting for the grouped display of the overview in the preferences under Payment recording. With this, a separate table for different originator data, payment types and states are displayed.
This lets you export one or multiple payments as a CSV file.
When you are operating BL Banking in a network installation, refreshing causes to show the open payments that were entered by other users. You can also access this function via the Edit menu, the toolbar or the F5 key.
Accordingly, this menu item is also shown in the other tabs within the Payments perspective. However, a query is performed at the bank for certain overviews, for instance to update the status of the payment.
This directly calls up the dialog box of the preferences for payment recording.