Figure: Create user
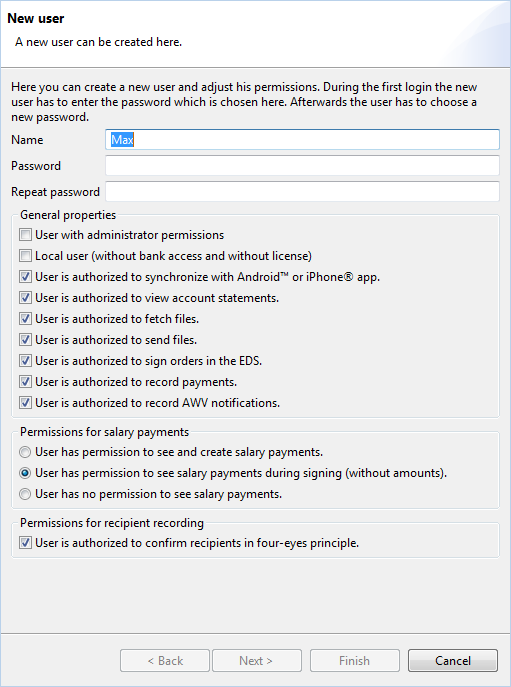
In this window, you can add a new employee or edit an existing one. When editing, the title of the window is Edit user and the fields are filled with the values of the user selected in the overview.
To set up a new user, enter the user name and a temporary password, which can be short and simple. You can define the requirements that should apply to the assignment of passwords for all users, see the section Password requirements in the chaper User preferences. By default, at least 8 characters consisting of upper and lower case letters, a number and a special character are required. The user must change the temporary password assigned here as soon as he logs in to the program for the first time. This and the further procedure are described in section Initialization. The user name must be unique in the program and can be changed. The name is displayed in printouts and next to the program title.
If you edit your own, already created user, all permissions in this section are grayed out.
Here you can grant or revoke administrator rights for the user selected in the overview. For a list of these permissions, see the section Administrator rights.
The property "local" user cannot be changed later. Local users have no bank access and thus cannot exchange data with the bank. Apart from that, they can use all functions of BL Banking, e.g. record payments or view account statements. A local user is marked with No in the Bank access column of the overview. A license for BL Banking is not required for a local user.
By unchecking this box you revoke the selected user's right to synchronize the application data with a smartphone app. The corresponding menu item under Actions is then not available.
You can set more permissions with the following checkboxes, such as User is authorized to record payments, User is authorized to sign orders in the EDS or User is authorized to view account statements. If these permissions are revoked from a user, he cannot see any data in the belonging views and cannot start any actions connected with them. In addition, he cannot make any changes to the corresponding preferences and bank properties. This way, it is possible to assign certain roles to employees in a multi-user installation, such as Payment typist or EDS signatory.
Assign the desired permission level to the user. The settings are used to control the amounts in salary payments. For this purpose, salary payments must be specified as such. For SEPA payments either the field Payment category or Payment type is filled with one of the values SALA, PENS or BONU.
In principle, you should send several salary payments in one order. When entering payments, the option Display as single booking in the account statement should be switched off to prevent individual salary payments from being displayed in the account statement. The total of the payments contained in the order will nevertheless be displayed in the account statement.
Furthermore, it is recommended to encrypt the local files, as otherwise direct access to the payment files is possible. The setting for this can be found in the Preferences under General information.
In the preferences, you can specify that newly created or edited payment recipients must be confirmed by a second user according to the four-eyes principle. Here you can set the right for this individually for each user. For your own, already created user, this permission is grayed out.
Figure: Create user
By clicking on Next, you proceed to the window Bank selection, where you can select the banks, that shall be visible for the user. After another click on Next, the window Select accounts appears, where you can configure the accounts that the user shall be able to choose from while recording payments. This does not affect the display in the Account overview. Clicking on Finish returns you to the window User administration, which now shows the new user in the list.
You can view the Bank access overview and Account permissions for all employees at any time, as well as change the latter.