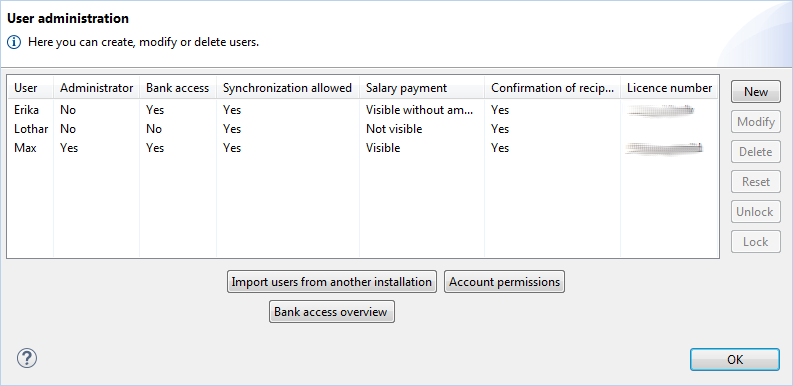
Figure: User administration
You can set up multiple users in one BL Banking installation. To do so, please choose User administration from the Edit menu. Then you will see a window with a list of all users, who are registered in your BL Banking installation. Here you can add, edit, delete, reset, unlock and import users, as well as configure their permissions.
In the overview the permissions of the users set up in the program are displayed. These can be assigned when creating or changing a user. The access to the banks and accounts set up in the program is set in separate windows, which can be accessed using the buttons below the overview. Furthermore, the overview shows the licence number, which you received when you purchased the program.
Figure: User administration
At the side and below the overview there are buttons for the following functions.
To set up a new user, click the New button and the window New user will appear. If you click on Modify, the same window appears with the values of the user selected in the overview. With the Delete button you can remove the selected user, but not yourself. The process must be confirmed in another window.
A click on Reset opens a new dialog box, where you can reset the password and bank connections of the selected user. This function is described in section Reset user. The Unlock button can be used to give a user, who has entered a wrong password five times during login, five more attempts to enter the correct password. With Lock you can to prevent a user from logging in to the program. The password and keys will thereby remain unchanged. Removing this lock is also done with the Unlock button.
These buttons open the windows Bank access overview or Account permissions respectively.
You can import users from a different installation of the same version of BL Banking. To do this, you need to have access from your computer to the workspace directory of the other installation. Then click Import users from another installation. This will open the dialog box Import of users, where you can select the workspace directory of the other installation. If the versions are identical and access to the data is possible, the other users will be displayed. By clicking Finish the other users and their bank connections are imported, provided that these do not already exist. Other data from the other installation, such as account statements and payments are not imported.