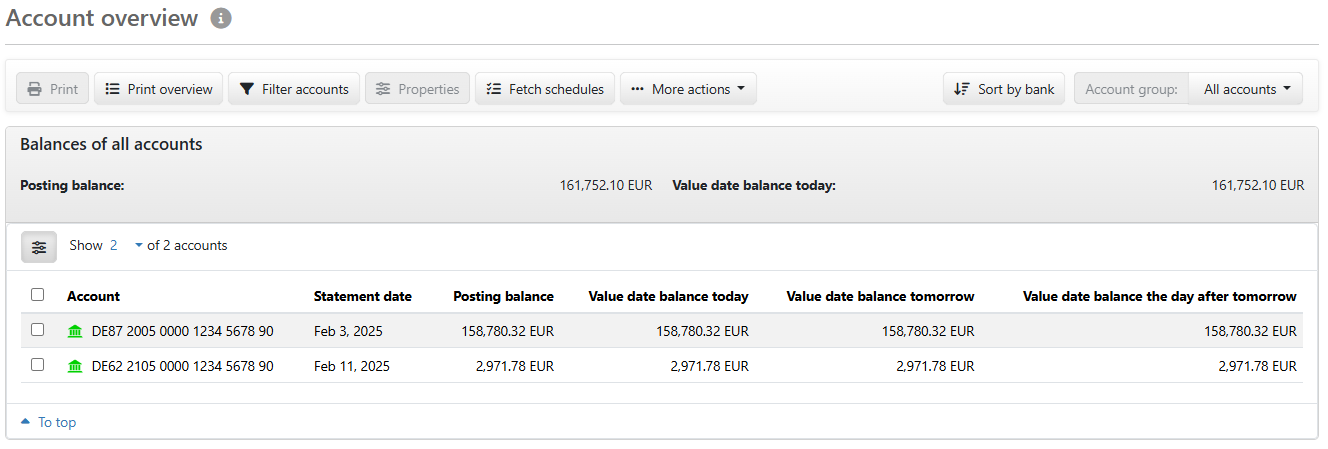
Figure: Overview of the accounts
Users with the permission to see account statement can open this page via the menu Account statements and by default also via quick access from the Home page. Here you can see an overview of all accounts for which account statements are available. The balances of all existing or selected accounts are displayed in the gray bar above.
The following columns are displayed by default:
You can use the Column configuration to display additional columns. The following are particularly relevant:
You can display additional designations to identify the account. The Standard name is assigned in the settings uniformly for all accounts, consisting of IBAN or bank code with account number, if necessary with foreign currency. The Description from the bank profile is an optional entry that comes from the EBICS bank server for the accounts specified by the bank.
The columns Free liquidity and Credit limit are useful for accounts for which an administrator or manager has defined a credit limit or an investment amount, which can be found in the settings for accounts under Account statements.
You can include the available columns for the account overview in your personal standard, see User preferences – Account information – Display settings.
The account overview is limited to the accounts of the banks to which you are assigned as a user. The user permissions on the accounts are not processed by default, so you may see account statements for accounts for which you cannot enter payments or submit orders to the bank yourself. In the system settings, an administrator or manager can restrict the display to the accounts for which you have payment permissions, i.e. permissions for accounts and order types.
Click on an account to navigate to the overview Transactions, where the account statements and transactions of the selected account are displayed. You can also access this page via the menu item Account statements – Transactions and selecting the account.
You can download the overview or selected account statements as a PDF file to your computer. For further information see section Print and export.
This button opens a dialog box in which you can enter a filter term. The term must consist of at least one character and can be located anywhere in the account properties. After clicking on Submit, the overview is displayed in filtered view and the applied term in a yellow info bar. Click on the button Deactivate within the bar to switch off the filter. With another click on Filter accounts, the dialog box opens with the previously entered term, which can be changed there or deleted by clicking on Reset. If there is no common filter term for the desired selection, you can create a grouping, see Account groups.
By selecting an individual account in the overview, you can open the page Konto bearbeiten by clicking on Properties, view the account settings and also edit them as an administrator or manager. Further information can be found in chapter Account statements of the chapter Edit account.
If account statements are missing in the overview, you can use this button to open the page Settings – Fetch schedules to check the configuration of the fetch schedules, change them if necessary, add new techt schedules and execute them.
In addition to sorting by column headings, you can use this button to sort the overview alphabetically in descending order by bank name. This sorting is canceled by clicking on a column heading.
Select at least one account in the overview to be able to perform an action especially for it. The actions Import statements, Export statements and those concerning Account groups are described in the following sections.
Only users with the permission to delete account statements and PDF account statements can see this action. You can delete the statement data for one or more accounts. The process must be confirmed in a dialog box. After deleting, the affected accounts are no longer displayed in the overview until new account statements are retrieved or imported for them.
The reading marker helps you to distinguish between read and unread statements. Newly retrieved account statements are marked as unread in bold on this page by default. The unread marker can be optionally set during import. In addition, the number of unread account statements is also displayed on the start page behind the link text. Clicking on a line opens the transaction overview and the statement is then marked as read without bold font. To mark statements as read without opening the transaction overview, select this action. If you do not want the read marker in this way, you can deactivate the setting Highlighting of new statements in account overview and booking views in your user preferences or set it to manual, to be found in the Display settings for the Account information mentioned above.
Figure: Overview of the accounts