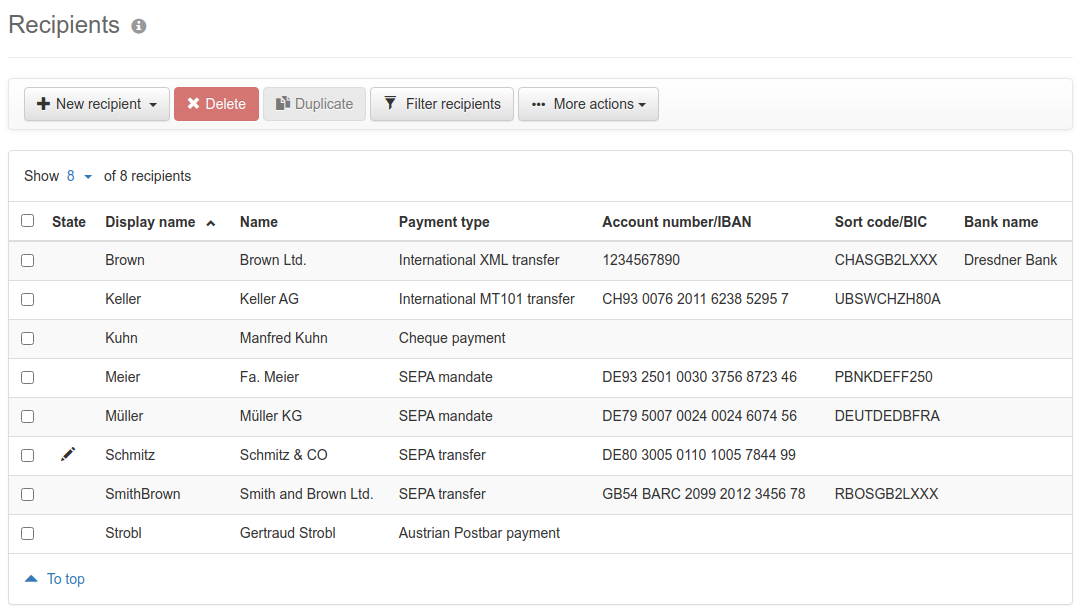
Figure: Overview of the recipients
On this page, you can enter frequently used recipients once, in order to be able to select them each time you enter payments. To create a new entry, click New recipient and select the payment type, for which the recipient shall be used. This will take you to the entry page, which is different for each payment type. Descriptions can be found in the sections below Record recipient.
You can also create a recipient, when you import an open or periodic payment. If you choose the option offered during import, the recipient contained in the file is created automatically. Furthermore, you can also save the entered recipient when recording a payment.
To edit a recipient that has already been entered, click on the line in the overview. The page for editing will then be displayed. This is identical to the entry page, however here with the fields filled in. If in the preferences the four-eyes principle is configured for recipient recording, there is the additional column State in the overview. If a recipient is marked with a brush symbol there, he has yet to be confirmed by another user. For more information about this see the section Confirm recipient.
The next two buttons are only activated if at least one line in the overview is selected. A click on Delete opens a dialog box, where the process must be confirmed. With Duplicate, copies of the selected recipients are created.
Clicking on Filter payments opens a dialog box, where you can enter a search term by which the overview is filtered. After a click on Submit, the dialog box closes and the overview is displayed filtered. This is also indicated with a yellow bar. Click the button again to deactivate the filter. A further click opens the dialog box with the previously entered term, which can be changed there or deleted by clicking Reset.
By clicking on More actions, additional menu items become visible. With Import you can import one or more recipients from an external CSV file. For this purpose, a new page is opened, which is described in the section Import recipients. Save is used to download the lines marked in the overview as a CSV file to your computer.
Figure: Overview of the recipients