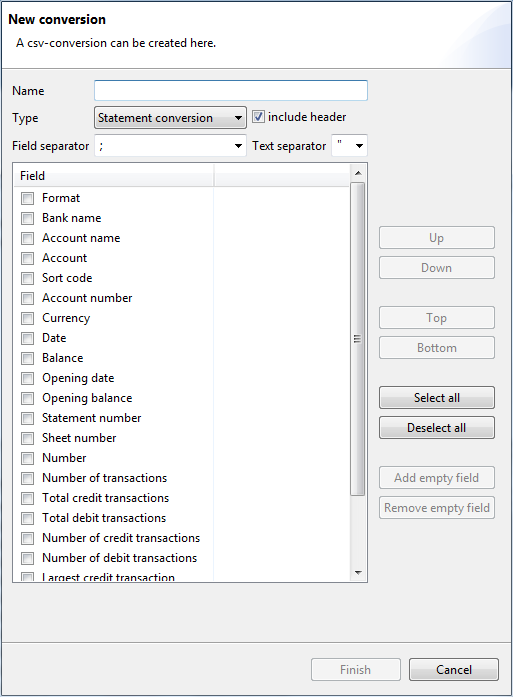
Figure: Dialog box to create a new conversion
Conversions are used to change account information into the CSV format during an automatic or manual export. Here you can create a conversion and also edit an existing one. The window title is then either New conversion or Change of a conversion and the fields are either empty or completed with the values of selected settings.
Enter the name for the format here. Select a meaningful name in this case, so that you can find the desired format more easily in the next steps. The name selected here is optionally also applied to the name of the output file.
Select the type of conversion here. When you switch to Transaction conversion with the Type drop-down list, more fields are shown in the Field list. These fields also refer to transactions.
When you activate this checkbox, the first row includes the field names of the output file.
Select the character used to delimit the fields in the output file. Do so by either selecting from the drop-down list or by entering an arbitrary character.
Select a character used to delimit text, so that text can be distinguished from numbers. The characters in the drop-down list are generally used for this. As is the case for the field separator, you can also use any character for this. You can also delete the character completely, e.g. completely omit using the text separator.
Here, you can highlight all fields that will be shown as columns in the output file. The indicated sequence also determines the sequence in the output file.
In order to change the sequence, mark the desired field and move it incrementally in the desired direction with the Up or Down buttons.
Using the Top and Bottom buttons, you can move a field all the way to the beginning or the end.
Click the Select All button when you want to apply all fields as columns in the output file. If you want to start over, click Deselect all.
You can enter an empty column to the output file. This may be necessary, for instance when the program you intend to use to import data requires a certain field format that is not available in the account information. Do so by marking the field above which the empty field will be inserted and click on Add empty field. To remove an empty field, highlight the field and click on Remove empty field.
If you have activated the include header checkbox for a conversion, the corresponding columns in the output file are labeled as Empty field.
Figure: Dialog box to create a new conversion
For the transaction conversion, a unique identifier can be selected in addition to the fields from the account information, which is then also written into the CSV file during the export. This can be useful in the subsequent processing to avoid confusion with already existing transactions. The identifier is referred to as Database-Id in the list of fields.