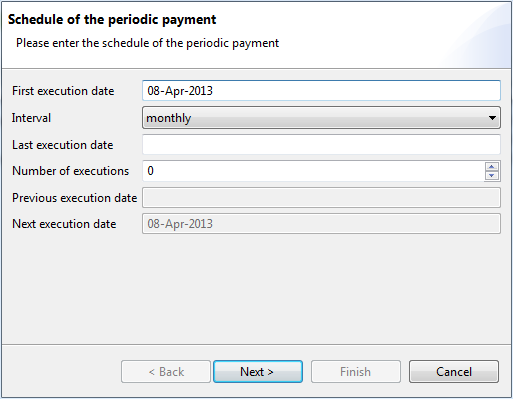
Figure: Dialog box for the execution schedule of a periodic payment
Periodic payments are entered with the help of a wizard that consists of three steps. The first step is used to enter the execution schedule, the payment type is entered in the second step, and the actual payment is entered in the third step.
Enter the date of the initial execution here.
Use the drop-down list to select the interval at which the payment will be executed.
Enter at what point you want the payment to be executed for the last time. This date must match the date of the first execution. The corresponding value in the Number of executions field is entered automatically.
Alternatively to the above field, you can also enter the number of executions here. The last execution is then entered automatically. The default value of 0 means that the execution is repeated indefinitely.
Enter a value of 1 in this field if you wish to prepare fully formatted payment orders that will be triggered manually. Please proceed as described in section Periodic payments - Create payment now.
These two fields show the last and next execution for control purposes.
Figure: Dialog box for the execution schedule of a periodic payment
Clicking on the Next button brings you to the next step in the wizard. Select the payment type for the periodic payment in the wizard and click on Next. This is followed by the corresponding dialog box for entering the selected payment type. The dialog boxes are identical with those described under section Record payment.
After clicking on Finish, the new periodic payment is saved and displayed in the overview. If the payment is already due, an open payment is also created, which is displayed in a dialog box.